目录
- 参考代码
- 1.目录
- 2.布局文件
- 3.创建MyService类
- 4.Activity
- 效果图
- 1.运行界javascript面
- 2.服务创建服务绑定
- 3.服务解绑和销毁
采用Service的方式,将Activity的计算的业务交给Service去做
参考代码
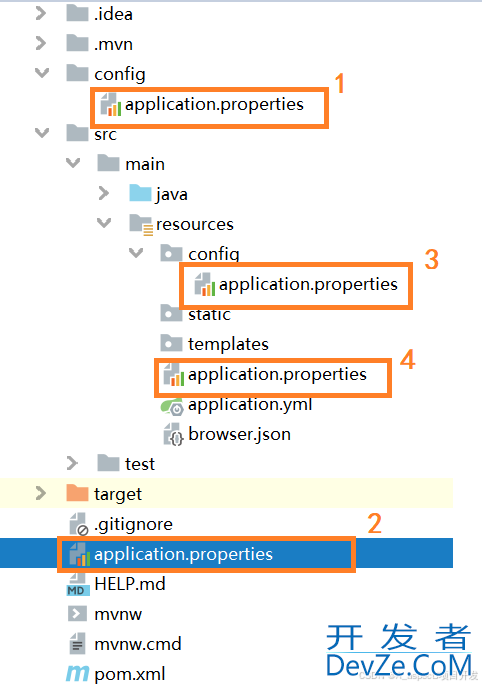
1.目录
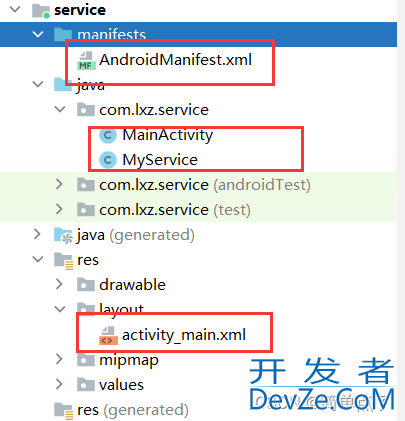
2.布局文件
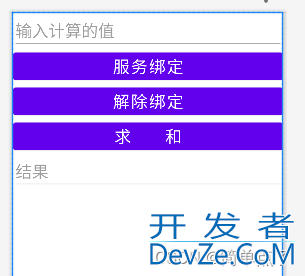
采用线性布局的方式
界面中主要包含的内容有EditText两个
三个Button按钮
布局界面代码:
<?XML version="1.0" encoding="utf-8"?>
<LinearLayout xmlns:android="http://schemas.android.com/apk/res/android"
    xmlns:app="http://schemas.android.com/apk/res-auto"
    xmlns:tools="http://schemas.android.com/tools"
    android:layout_width="match_parent"
    android:layout_height="match_parent"
    android:orientation="vertical"
    tools:context=".MainActivity">
    <EditText
        android:id="@+id/num"
        android:layout_width="match_parent"
        android:layout_height="wrap_content"
        android:hint="输入计算的值"
        android:textSize="25dp"
        android:singleLine="true"
        android:maxLength="10"
        />
    <Button
        android:id="@+id/btn1"
        android:layout_width="match_parent"
        android:layout_height="wrap_content"
        android:text="服务绑定"
        android:textSize="25dp"
        />
    <Button
        android:id="@+id/btn2"
        android:layout_width="match_parent"
        android:layout_height="wrap_content"
        android:text="解除绑定"
        android:textSize="25dp"
        />
    <Button
        android:id="@+id/btn3"
        android:layout_width="match_parent"
        android:layout_height="wrap_content"
        android:text="求      和"
        android:textSize="25dp"
        />
    <EditText
        android:focusable="false"
        android:enabled="false"
        android:focusableInTouchMode="false"
        android:singleLine="true"
        android:id="@+id/result"
        android:layout_width="match_parent"
        android:layout_height="wrap_content"
        android:hint="结果"
        android:textSize="25dp"
        />
</LinearLayout>
预览图:
3.创建MyService类
提供服务的类
需要继承Service
因为采用的是绑定服务的方式需要重写create,bind,unbind以及destory生命周期方法
创建内部对象继承Bind用于再bind生命周期中返回用于提供服务实现交互
/*
* 需要进行静态注册
* */
public class MyService extends Service {
    //创建内部类对象
    MyBinder myBinder=new MyBinder();
    @Override
    public void onCreate() {
        Toast.makeText(this, "创建服务!", Toast.LENGTH_SHORT).show();
    }
    @Nullable
    @Override
    public IBinder onBind(Intent intent) {
        Toast.makeText(this, "绑定服务!", Toast.LENGTH_SHORT).show();
        //返回的对象是内部类对象
        return myBinder;
    }
    @Override
    public boolean onUnbind(Intent intent) {
        Toast.makeText(this, "解绑服务!", Toast.LENGTH_SHORT).show();
        return true;
    }
    @Override
    public void onDestroy() {
        Toast.makeText(this, "销毁服务!", Toast.LENGTH_SHORT).show();
    }
    //内部类
    class MyBinder extends Binder {
        //返回Service对象
        public MyService getService(){
            return MyService.this;
        }
        //计算
        //计算
        public int getSum(int n){
            int sum=0;
            for(int i=1;i<=n;i++){
                sum+=i;
            }
            return sum;
        }
    }
}
4.Activity
控件的定义
事件监听器的创建
连接对象的创建,创建ServiceConnection对象,重写服务编程客栈创建的方法,获取binder对象从而获得Service对象
调用服务的时候和Activity跳转的时候是类似的
调用Service服务的时候需要调用myBind就是调用了Service的内部类
public class MainActivity extends Activity {
    //定义控件
    Button btn1 = null;//绑定
    Button btn2 = null;//解绑
    Button btn3 = null;//求和
    EditText num;//计算数据
  开发者_Go学习  EditText result;//结果
    MyService.MyBinder myBinder = null;
    MyService myService = null;
    //创建连接对象
    private ServiceConnection conn = new ServiceConnection() {
        @Override
        public void onServiceConnected(ComponentName name, IBindephpr service) {
            myBinder = (MyService.MyBinder) service;
            myService = myBinder.getService();
        }
        @Override
        public void onServiceDisconnected(ComponentName name) {
        }
    };
    @Override
    protected void onCreate(Bundle savedInstanceState) {
     http://www.devze.com   super.onCreate(savedInstanceState);
        setContentView(R.layout.activity_main);
        //获取控件
        initView();
        //求和
        getResultNum();
    }
    //初始化控件
    public void initView() {
        //获取开启服务按钮
        btn1 = (Button) findViewById(R.id.btn1);
        //获取停止服务按钮
        btn2 = (Button) findViewById(R.id.btn2);
        //求和
        btn3 = (Button) findViewById(R.id.btn3);
        //获取要计算的数据
        num = findViewById(R.id.num);
        // 获取结果值
        result = findViewById(R.id.result);
        //调用点击事件
        btn1.setOnClickListener(new View.OnClickListener() {
            @Override
            public void onClick(View v) {
                Intent intent = new Intent(getApplicationContext(), MyService.class);
                intent.putExtra("num", num.getText().toString());
                bindService(intent, conn, Service.BIND_AUTO_CREATE);
            }
        });
        //解绑服务
        btn2.setOnClickListener(new View.OnClickListener() {
            @Override
            public void onClick(View v) {
                unbindService(conn);
            }
        });
    }
    private void getResultNum() {
        btn3.setOnClickListener(new View.OnClickListener() {
            @Override
            public void onClick(View v) {
                if (num.getText().toString().length() == 0) {
                    result.setText("");
                    Toast.makeText(getApplicationContext(), "要计算的结果不能为空!", Toast.LENGTH_SHORT).show();
                }
                else if (num.getText().toString().matches("\\d*")==falsejavascript){
                    result.setText("");
                    Toast.makeText(getApplicationContext(), "要计算的数据必须为数字!", Toast.LENGTH_SHORT).show();
                }
                else {
                    result.setText(myBinder.getSum(Integer.parseInt(num.getText().toString()))+"");
                }
            }
        });
    }
}
效果图
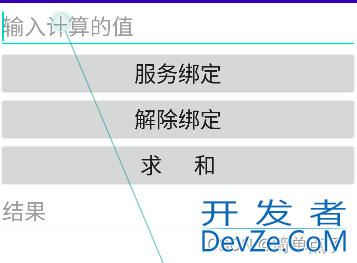
1.运行界面
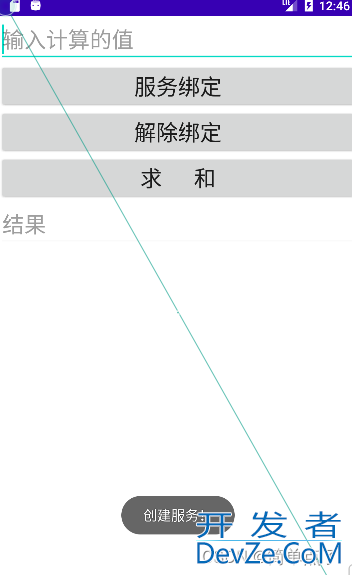
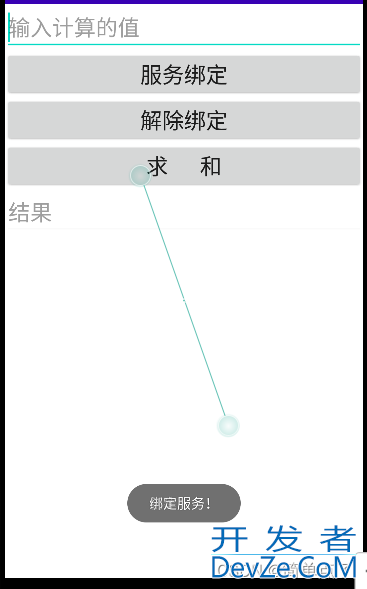
2.服务创建服务绑定
首先先进行服务的创建再进行服务的绑定
3.服务解绑和销毁
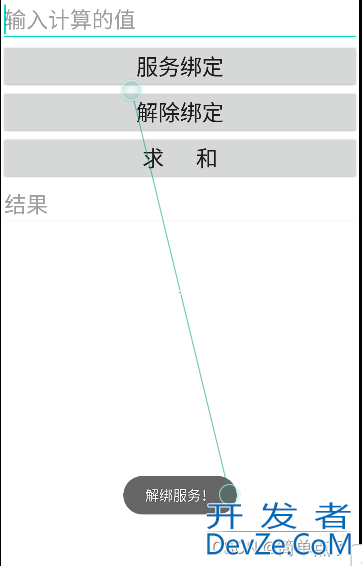
解绑服务会调用Unbind生命周期,又因为没有别的可以解绑的服务,所以就会调用Destory生命周期方法
到此这篇关于Android开发服务Service全面讲解的文章就介绍到这了,更多相关Android Service内容请搜索我们以前的文章或继续浏览下面的相关文章希望大家以后多多支持我们!



 加载中,请稍侯......
精彩评论