目录
- 前言
- 思路:
- 一:切块
- 二:融合txt文件
- 三:原图显示
- 总结
前言
当我们在检测较大分辨率的图片时,对小目标的检测效果一直是较差的,所以就有了下面几种方法:
- 将图片压缩成大尺寸进行训练( 想法:没显存,搞不来)
- 添加小检测头(想法:P5模型还有点用,P6模型完全没用)
- 添加一些检测模型和玄学机制(想法:你要是写论文就去看看知*吧,只需要在最后面加一句:已达到工业检测要求)
- 切图检测(想法:比较耗时,过程也比较繁琐,可以尝试)
切图检测
思路:
- 将原图切成你想要的数量
- 将切成的小图进行训练,得到模型
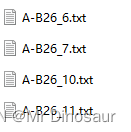
- 将你需要检测的图片切成小图,用模型检测,并得到每张图目标位置的信息,保存在对应图片的txt文件
- 将所有txt文件融合,得到1个txt文件,并在原图上显示
一:切块
# -*- coding:utf-8 -*-
import os
import matplotlib.pyplot as plt
import cv2
import numpy as np


def divide_img(img_path, img_name, save_path):
    imgg = img_path + img_name
    img = cv2.imread(imgg)
    #   img = cv2.cvtColor(img,cv2.COLOR_BGR2RGB)
    h = img.shape[0]
    w = img.shape[1]
    n = int(np.floor(h * 1.0 / 1000)) + 1
    m = int(np.floor(w * 1.0 / 1000)) + 1
    print('h={},w={},n={},m={}'.format(h, w, n, m))
    dis_h = int(np.floor(h / n))
    dis_w = int(np.floor(w / m))
    num = 0
    for i in range(n):
        for j in range(m):
            num += 1
            print('i,j={}{}'.format(i, j))
            sub = img[dis_h * i:dis_h * (i + 1), dis_w * j:dis_w * (j + 1), :]
            cv2.imwrite(save_path + '{}_{}.bmp'.format(name, num), sub)


if __name__ == '__main__':

    img_path = r'G:\1/'
    save_path = r'开发者_Go入门G:\3/'
    img_list = os.listdir(img_path)
    for name in img_list:
        divide_img(img_path, name, save_path)
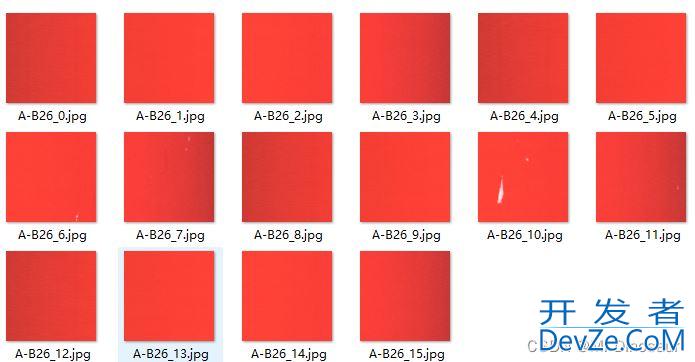
使用模型检测后得到:
二:融合txt文件
import os
from cv2 import cv2

# 保存所有图片的宽高
# todo: img_info={'name': [w_h, child_w_h, mix_row_w_h, mix_col_w_h]}
img_info = {}
all_info = {}


# 初始化img_info
def init(big_images_path, mix_percent, rows, cols):
    image_names = os.listdir(big_images_path)
    for img_name in image_names:
        big_path = big_images_path + '\\' + img_name
        # print(big_path)
        img = cv2.imread(big_path)
        size = img.shape[0:2]
        w = size[1]
        h = size[0]
        child_width = int(w) // cols
        child_height = int(h) // rows

        mix_row_width = int(child_width * mix_percent * 2)
        mix_row_height = child_height

        mix_col_width = child_width
        mix_col_height = int(child_height * mix_percent * 2)
        # 根据img保存wphp和h
        img_info[img_name.split('.')[0]] = [w, h, child_width, child_height, mix_row_width, mix_row_height,
                                            mix_col_width, mix_col_height]


# 读取所有检测出来的 小图片的label
def get_label_info(labels_path, mix_percent, rows, cols):
    labels = os.listdir(labels_path)
    for label in labels:
        # print(label)
        # todo: type: 0正常, 1row, 2col
        # 判断该label属于哪一张图片
        cur_label_belong = label.split('_')[0]
        cur_big_width = img_info[cur_label_belong][0]
        cur_big_height = img_info[cur_label_belong][1]
        # 融合区域距离边界的一小部分宽高
        cur_row_width_step = img_info[cur_label_belong][2] * (1 - mix_percent)
        cur_col_height_step = img_info[cur_label_belong][3] * (1 - mix_percent)
        # 文件名给予数据
        # child_type = []
        # child_num = []
        # label内容给予数据
        child_class_index = []
        child_x = []
        child_y = []
        child_width = []
        child_height = []

        type = -1
        num = -1
        class_index = -1
        x = 0.0
        y = 0.0
        width = 0.0
        height = 0.0

        # print(f'{label}')
        # 读取所有需要的数据
        f = open(labels_path + '\\' + label, 'r')
        lines = f.read()
        # print(lines)
        f.close()
        contents = lines.split('\n')[:-1]
        # print(contents)
        for content in contents:
            content = content.split(' ')
            # print(content)
            class_index = int(content[0])
            x = float(content[1])
       编程客栈     y = float(content[2])
            width = float(content[3])
            height = float(content[4])
            pass
            # print(class_index, x, y, width, height)
            assert class_index != -1 or x != -1.0 or y != -1.0 or width != -1.0 or height != -1.0, \
                f'class_index:{class_index}, x:{x}, y:{y}, width:{width}, height:{height}'
            # 转换成 数据 坐标, 并根据不同的num进行处理
            num = label.split('_')[-1].split('.')[0]  # 图片尾号 命名: xxxx_x.jpg  xxxx_mix_row_xx.jpg xxxx_mix_col_xx.jpg
            cur_img_width = 0
            cur_img_height = 0
            distance_x = 0
            distance_y = 0
            small_image_width = img_info[cur_label_belong][2]
            small_image_height = img_info[cur_label_belong][3]
            if label.www.devze.comfind('mix_row') != -1:
                # type = 1.
                distance_x = int(num) % (cols-1)
                distance_y = int(num) // (rows-1)
                cur_img_width = img_info[cur_label_belong][4]
                cur_img_height = img_info[cur_label_belong][5]
                # row x 加上step
                x = x * cur_img_width + cur_row_width_step + distance_x * small_image_width
                y = y * cur_img_height + distance_y * cur_img_height
            elif label.find('mix_col') != -1:
                # type = 2
                distance_x = int(num) % cols
                distance_y = int(num) // rows
                cur_img_width = img_info[cur_label_belong][6]
                cur_img_height = img_info[cur_label_belong][7]
                # col y 加上step
                print(f'x:{x}, y:{y}, cur_img_width:{cur_img_width}, cur_img_height:{cur_img_height}')
                x = x * cur_img_width + distance_x * cur_img_width
                y = y * cur_img_height + cur_col_height_step + distance_y * small_image_height
                print(f'x:{x}, y:{y}, height:{cur_col_height_step}')
            else:
                # type = 0
                distance_x = int(num) % cols
                distance_y = int(num) // rows
                cur_img_width = img_info[cur_label_belong][2]
                cur_img_height = img_info[cur_label_belong][3]
                # 小图片内, 无需加上 step
                x = x * cur_img_width + distance_x * cur_img_width
                y = y * cur_img_height + distance_y * cur_img_height
            assert cur_img_width != 0 or cur_img_height != 0 or distance_x != 0 or distance_y != 0, \
                f'cur_img_width:{cur_img_width}, cur_img_height:{cur_img_height}, distance_x:{distance_x}, distance_y:{distance_y}'
            assert x < cur_big_width and y < cur_big_height, f'{label}, {content}\nw:{cur_big_width}, h:{cur_big_height}, x:{x}, y:{y}'
            width = width * cur_img_width
            height = height * cur_img_height
            assert x != 0.0 or y != 0.0 or width != 0.0 or height != 0.0, f'x:{x}, y:{y}, width:{width}, height:{height}'
            # child_type.append(type)
            # child_num.append(num)
            child_class_index.append(class_index)
            child_x.append(x)
            child_y.append(y)
            child_width.append(width)
            child_height.append(height)
        # todo: 所有信息 根据 cur_label_belong 存储在all_info中
        for index, x, y, width, height in zip(child_class_index, child_x, child_y, child_width, child_height):
            if cur_label_belong not in all_info:
                all_info[cur_label_belong] = [[index, x, y, width, height]]
            else:
                all_info[cur_label_belong].append([index, x, y, width, height])
        child_class_index.clear()
        child_x.clear()
        child_y.clear()
        child_width.clear()
        child_height.clear()


# print((all_info['0342']))
# todo: 转成 yolo 格式, 保存
def save_yolo_label(yolo_labels_path):
    for key in all_info:
        # img_path = r'G:\Unity\code_project\other_project\data\joint\big_images' + '\\' + key + '.JPG'
        # img = cv2.imread(img_path)
        yolo_label_path = yolo_labels_path + '\\' + key + '.txt'
        cur_big_width = img_info[key][0]
        cur_big_height = img_info[key][1]
        content = ''
        i = 0
        for index, x, y, width, height in all_info[key]:
            # print(all_info[key][i])
            x = x / cur_big_width
            y = y / cur_big_height
            width = width / cur_big_width
            height = height / cur_big_height
            assert x < 1.0 and y < 1.0 and width < 1.0 and height < 1.0, f'{key} {i}\n{all_info[key][i]}\nx:{x}, y:{y}, width:{width}, height:{height}'
            content += f'{index} {x} {y} {width} {height}\n'
            i += 1
        with open(yolo_label_path, 'w') as f:
            f.write(content)


def joint_main(big_images_path=r'G:\3',
               labels_path=r'G:\5',
               yolo_labels_path=r'G:\6',
               mix_percent=0.2,
               rows=4,
               cols=4):
    print(f'融合图片, 原图片路径:{big_images_path}\n小图检测的txt结果路径:{labels_path}\n数据融合后txt结果路径:{yolo_labels_path}')
    init(big_images_path, mix_percent, rows, cols)
    get_label_info(labels_path, mix_percent, rows, cols)
    save_yolo_label(yolo_labels_path)

joint_main()
三:原图显示
# -*- coding: utf-8 -*-
import os
from PIL import Image
from PIL import ImageDraw, ImageFont
from cv2 import cv2


def draw_images(images_dir, txt_dir, box_dir, font_type_path):
    font = ImageFont.truetype(font_type_path, 50)
    if not os.path.exists(box_dir):
        os.makedirs(box_dir)
    # num = 0

    # 设置颜色
    all_colors = [http://www.devze.com'red', 'green', 'yellow', 'blue', 'pink', 'black', 'skyblue', 'brown', 'orange', 'purple', 'gray',
                  'lightpink', 'gold', 'brown', 'black']
    colors = {}

    for file in os.listdir(txt_dir):
        print(file)
        image = os.path.splitext(file)[0].replace('XML', 'bmp') + '.bmp'
        # 转换成cv2读取,防止图片载入错误
        img = cv2.imread(images_dir + '/' + image)
        TURN = cv2.cvtColor(img, cv2.COLOR_BGR2RGB)
        img = Image.fromarray(TURN)
        # img.show()

        if img.mode == "P":
            img = img.convert('RGB')

        w, h = img.size
        tag_path = txt_dir + '/' + file
        with open(tag_path) as f:
            for line in f:
                line_parts = line.splandroidit(' ')
                # 根据不同的 label 保存颜色
                if line_parts[0] not in colors.keys():
                    colors[line_parts[0]] = all_colors[len(colors.keys())]
                color = colors[line_parts[0]]

                draw = ImageDraw.Draw(img)
                x = (float(line_parts[1]) - 0.5 * float(line_parts[3])) * w
                y = (float(line_parts[2]) - 0.5 * float(line_parts[4])) * h
                xx = (float(line_parts[1]) + 0.5 * float(line_parts[3])) * w
                yy = (float(line_parts[2]) + 0.5 * float(line_parts[4])) * h
                draw.rectangle([x - 10, y - 10, xx, yy], fill=None, outline=color, width=5)
                # num += 1
            del draw
            img.save(box_dir + '/' + image)
        # print(file, num)
    # print(colors)


def draw_main(box_dir=r'G:\5',
              txt_dir=r'G:\6',
              image_source_dir=r'G:\3'):
    font_type_path = 'C:/Windows/Fonts/simsun.ttc'
    print(f'标注框, 数据来源: {txt_dir}\n 被标注图片: {image_source_dir}\n 结果保存路径: {box_dir}')
    draw_images(image_source_dir, txt_dir, box_dir, font_type_path)


draw_main()
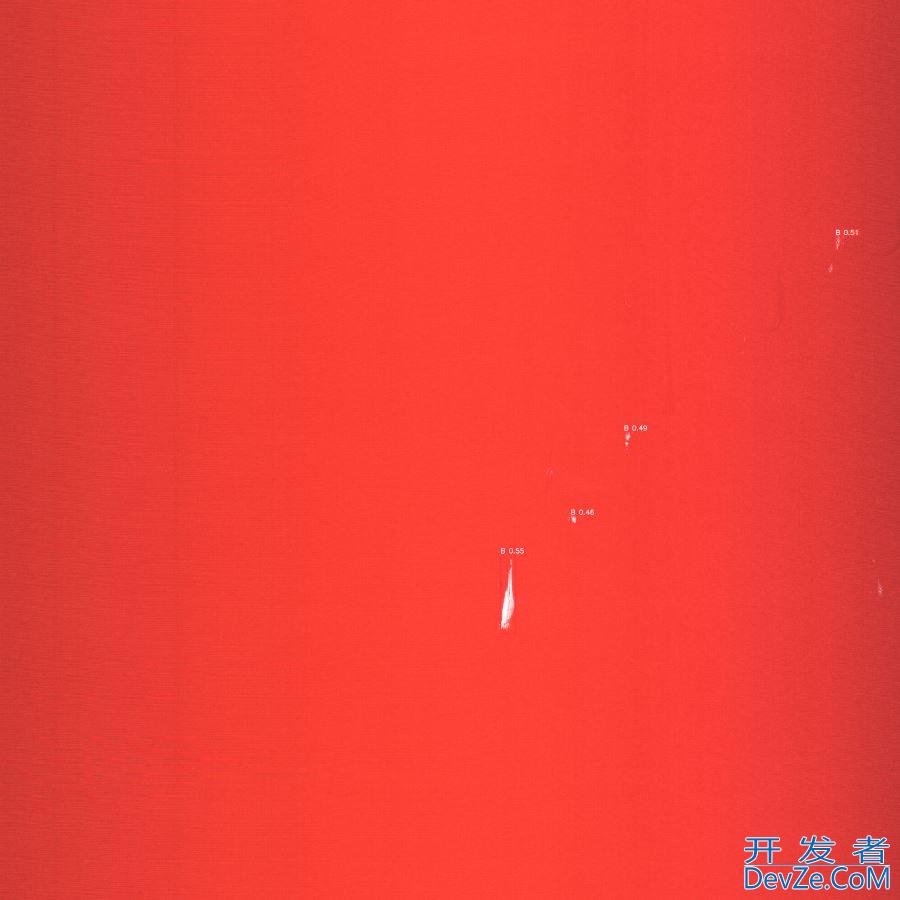
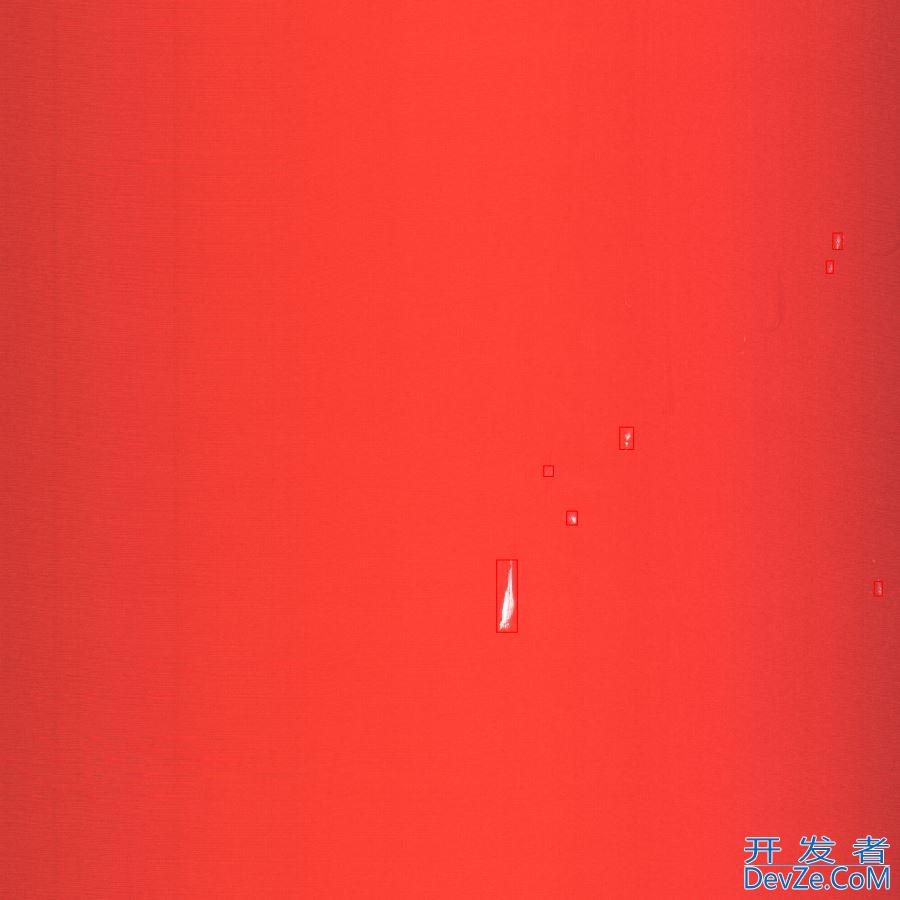
效果对比:(上YOLOv5检测,下YOLOv5+切图检测)
参考:
https://blog.csdn.net/qq_43622870/article/details/124984295
总结
到此这篇关于YOLOv5小目标切图检测的思路与方法的文章就介绍到这了,更多相关YOLOv5小目标切图检测内容请搜索我们以前的文章或继续浏览下面的相关文章希望大家以后多多支持我们!



 加载中,请稍侯......
精彩评论