目录
- 创建WebService项目
- 连接到WebService服务
- 总结
创建WebService项目
首先安装下.NET Framework4.6.2-4.7.1开发工具。
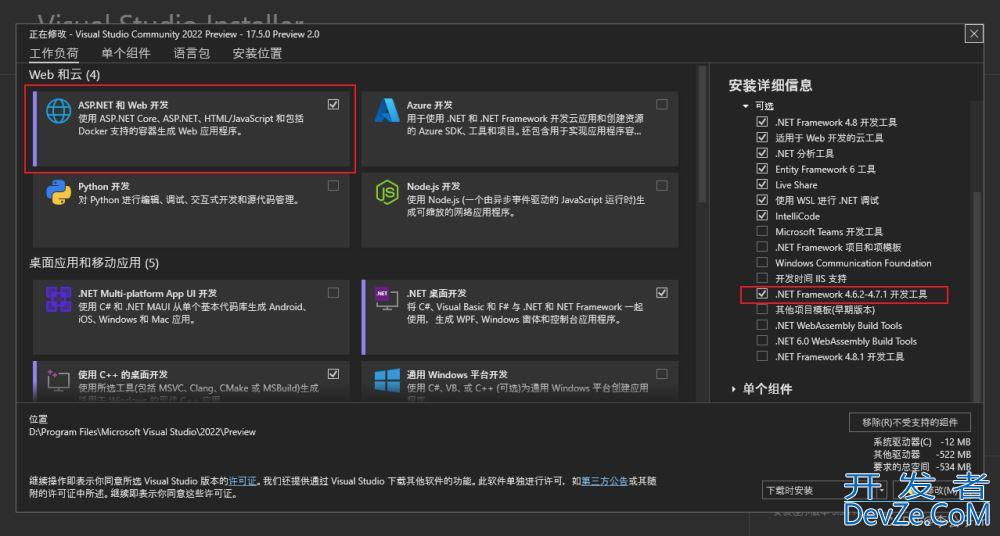
然后就是新建 ASP.NET Web应用程序 项目。
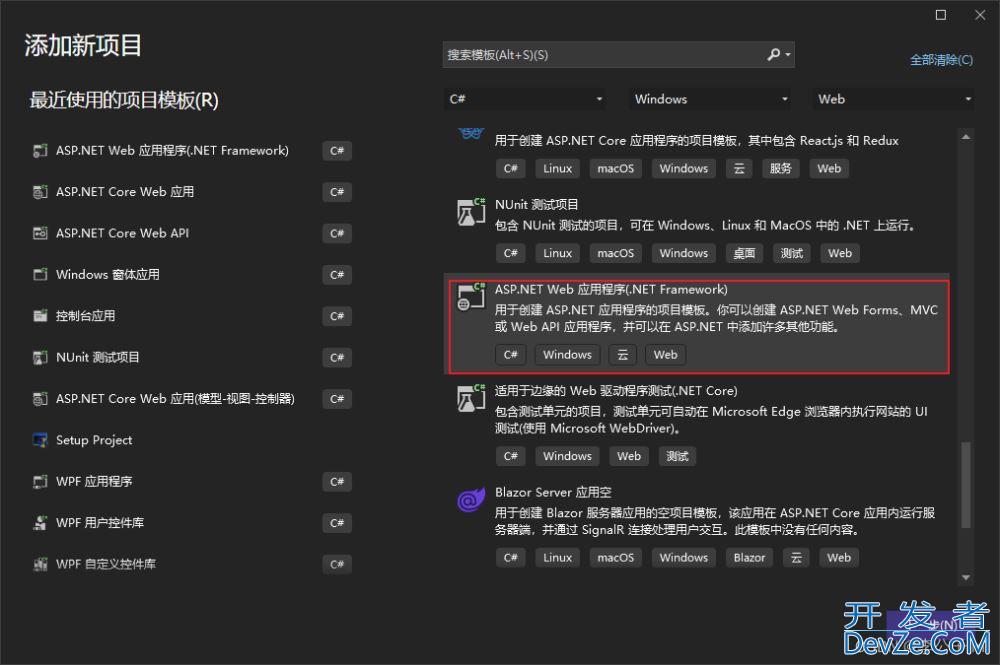
输入项目名称WebServiceDemo

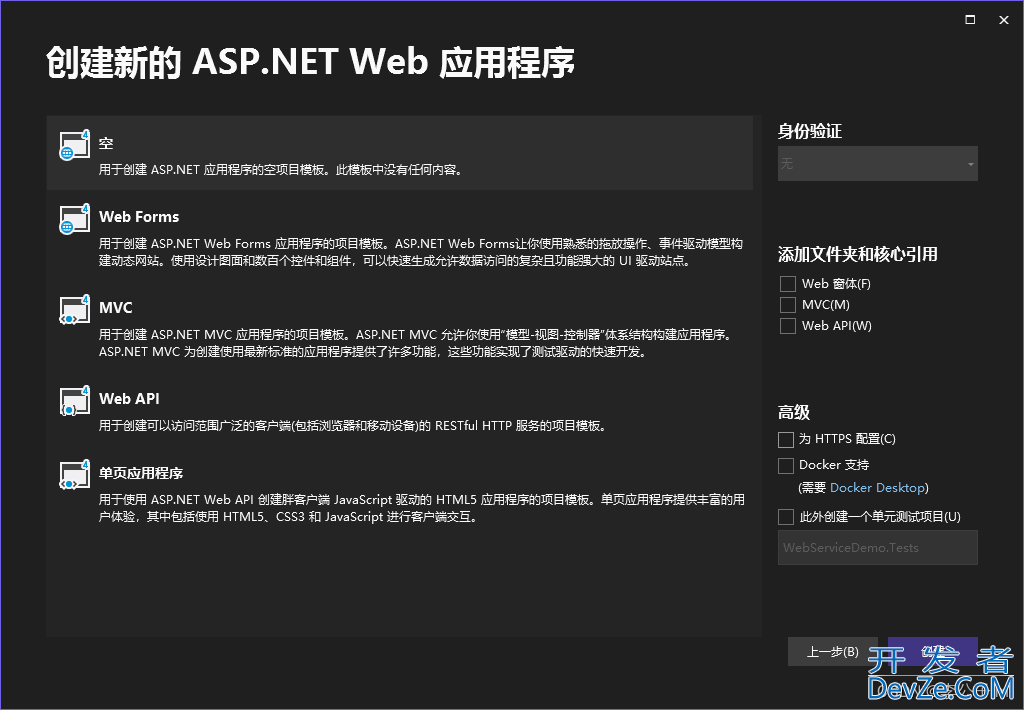
选择空,然后先去掉HTTPS配置。
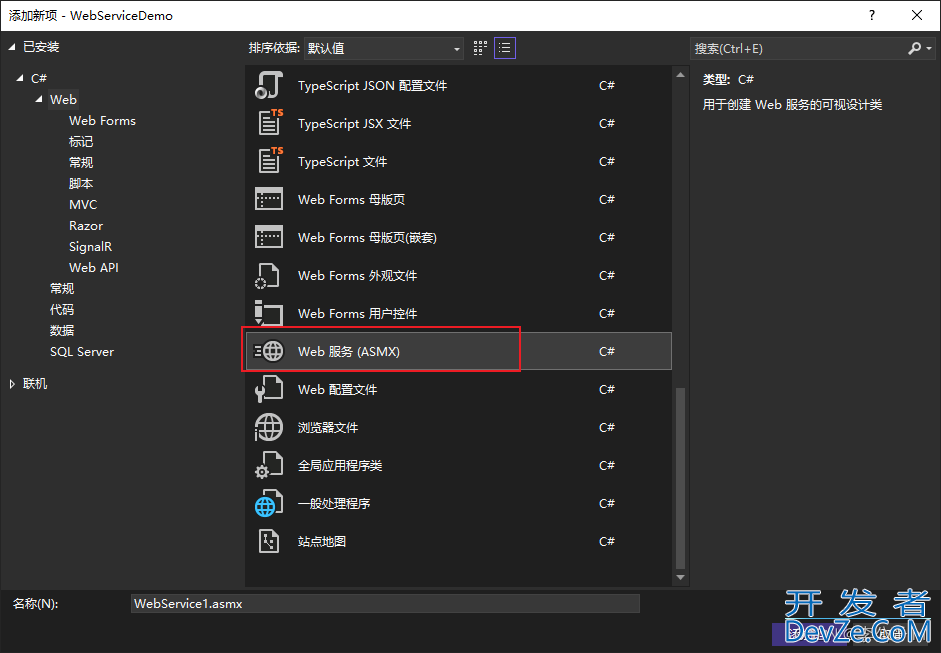
项目创建好之后,开始添加asmx文件.
添加好之后在添加一个有参数的名为Hello的方法。代码如下图。
using System;
using System.Collections.Generic;
using System.Linq;
using System.Web;
using System.Web.Services;

namespace WebServiceDemo
{
    /// <summary>
    /// WebService1 的摘要说明
    /// </summary>
    [WebService(Namespace = "http://tempuri.org/")]
    [WebServiceBinding(ConformsTo = WsiProfiles.BasicProfile1_1)]
    [System.ComponentModel.ToolboxItem(false)]
    // 若要允许使用 ASP.NET AJAX 从脚本中调用此 Web 服务,请取消注释以下行。
    // [System.Web.Script.Services.ScriptService]
    public class WebService1 : System.Web.Services.WebService
    {

        [WebMethod]
        public string HelloWorld()
        {
            return "Hello World";
        }
        [WebMethod]
        public string Hello(string name)
        {
            return "Hello"+name;
        }
    }
}
然后就可以直接启动了,也可以发布到IIS中启动。这里先发布到IIS,一会在新建一个控制台项目用于连接到编程客栈该服务。
发布好之后在IIS中添加网站,并绑定端口号为81.然后就可以启动了。
直接启动的话可能会报下面的错误,这是因为没有设置起始页。
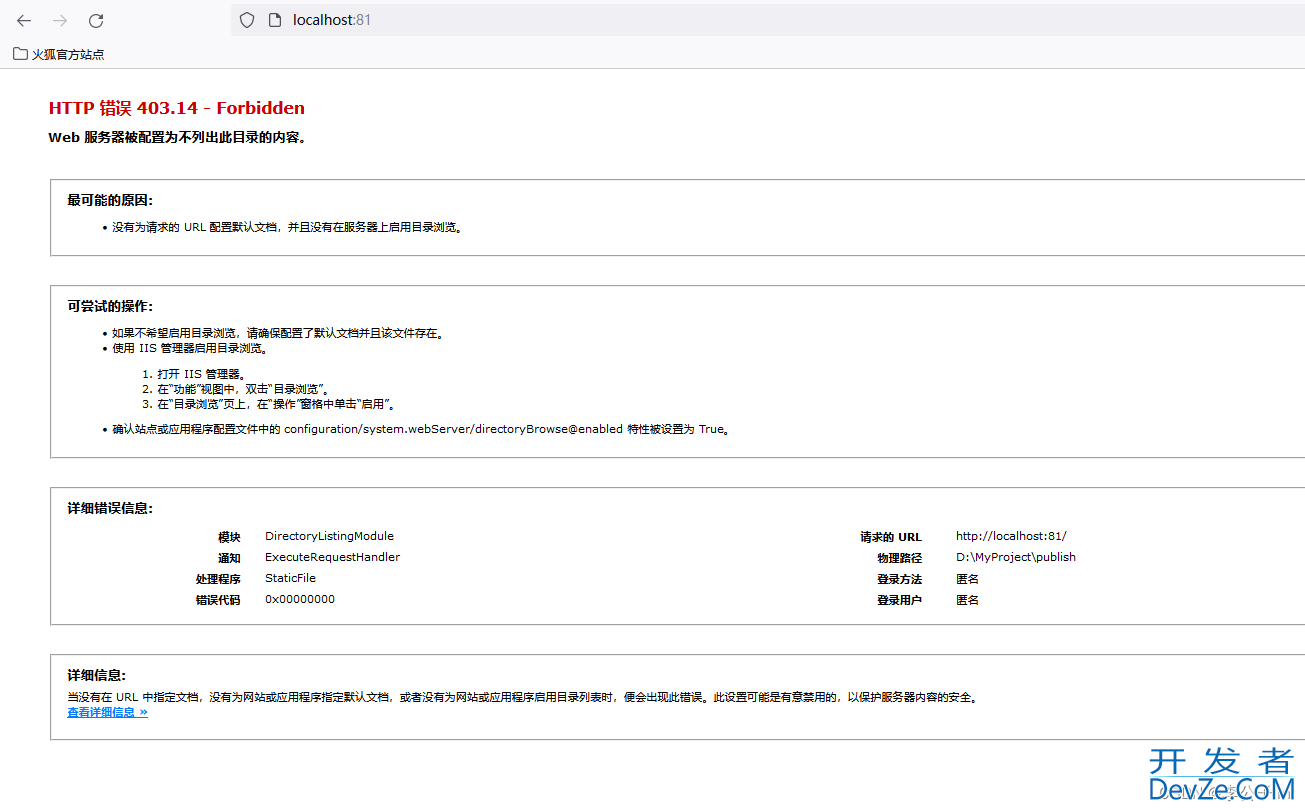
可以直接输入地址访问。
http://localhost:81/webservice1.asmx
也可以在IIS默认文档中添加webservice1.asmx文件。下次在浏览就可以直接打开了。
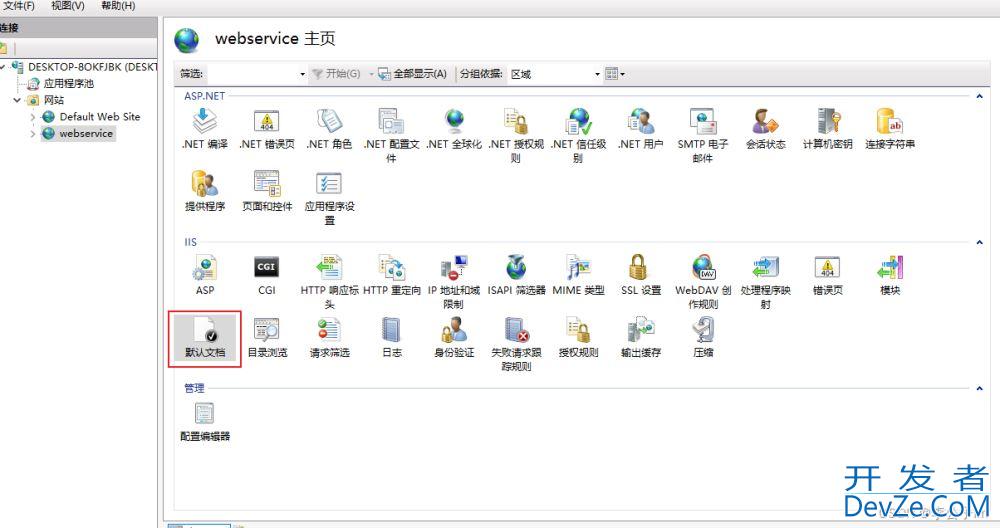
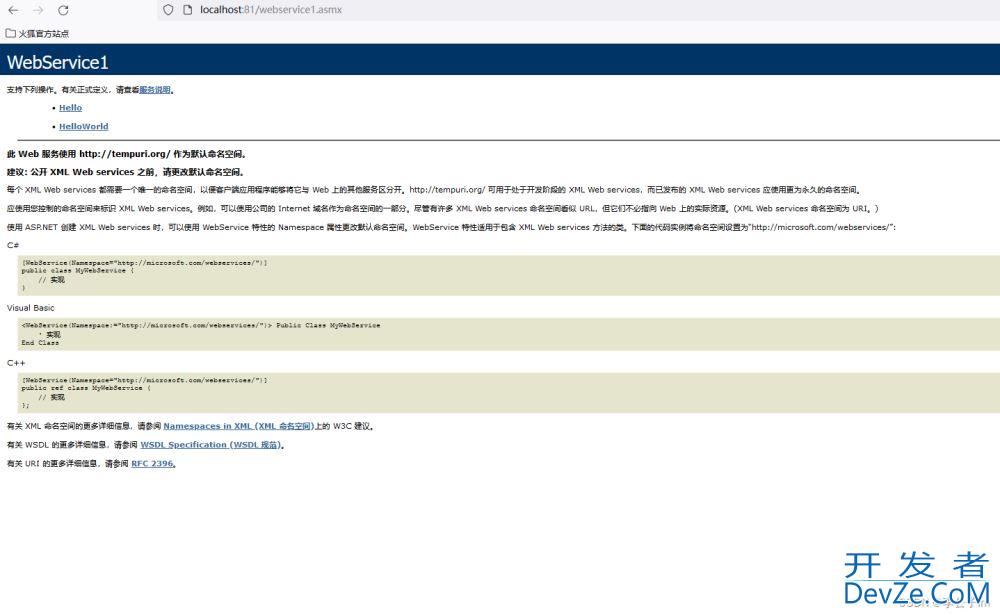
出现下图的页面,就表示服务已经部署成功了。
连接到WebService服务
新建一个控制台应用。
然后打开webservice地址输入。
http://localhost:81/webservice1.asmx?wsdl
会打开一个XML文件。
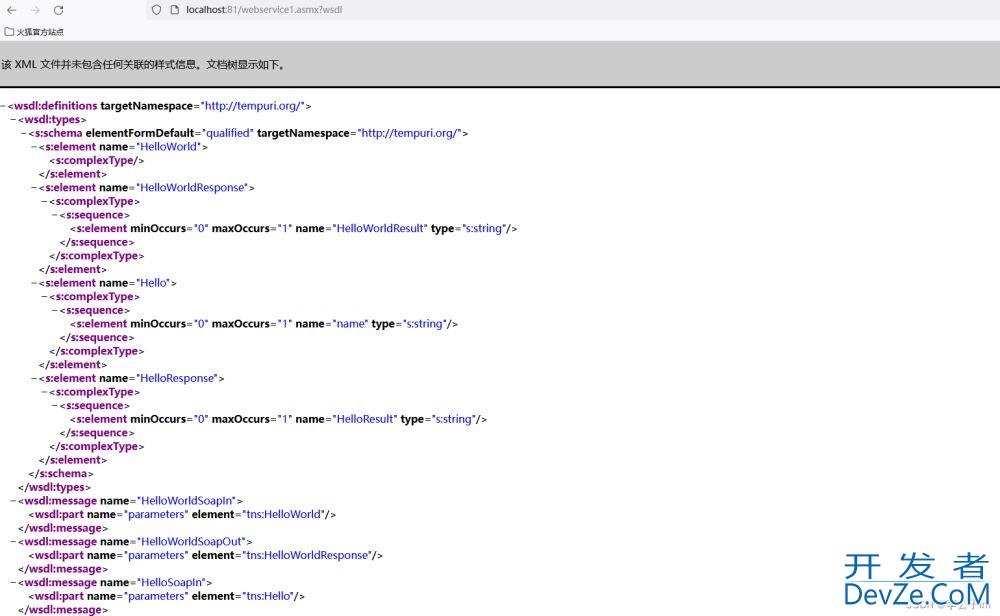
接着右键文件另存为,把文件保存下来。并修改文件后缀名为wsdl。

在VS中添加,添加服务引用。选择WCF Web Service。
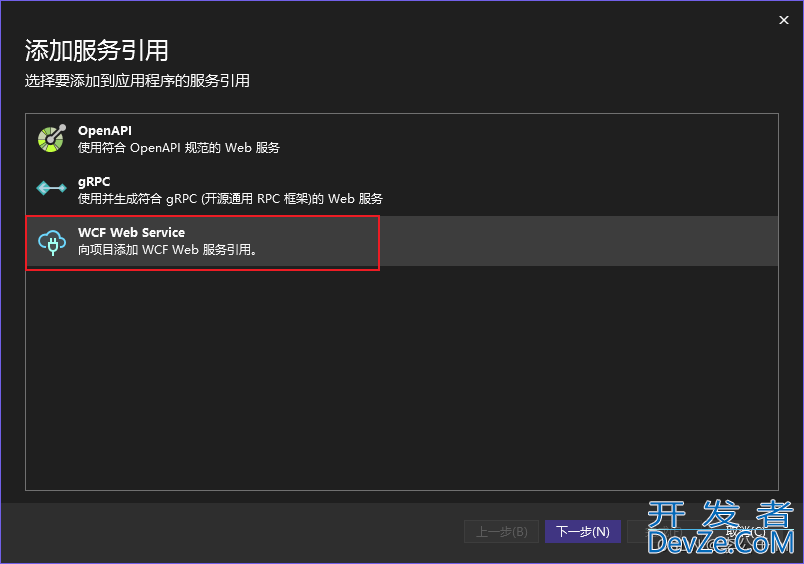
这里其实可以直接输入WebService的地址点击转到即可。当考虑到要连接的服务在本地不一定是可以访问的,所以我们可以点击浏览通过上面生成的wsdl文件来生成对应的代码。
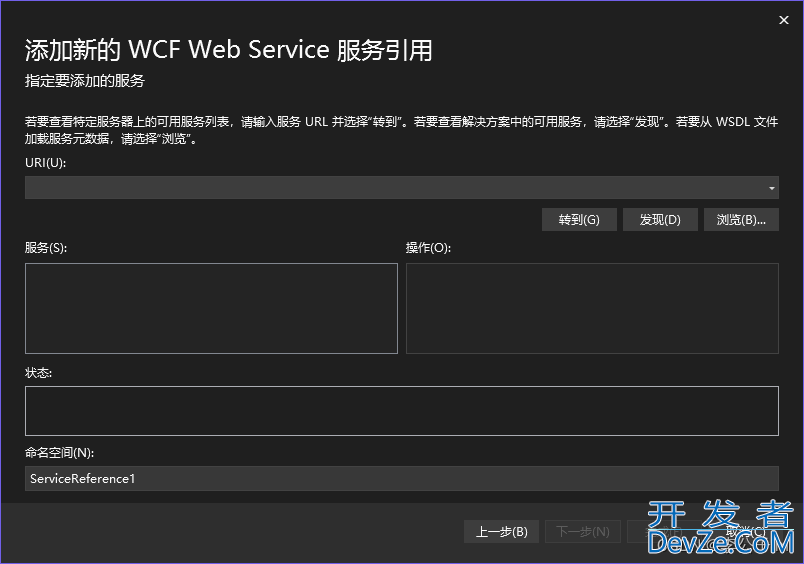
添加进来后如下图所示,命名空间可以按照实际名称修改。
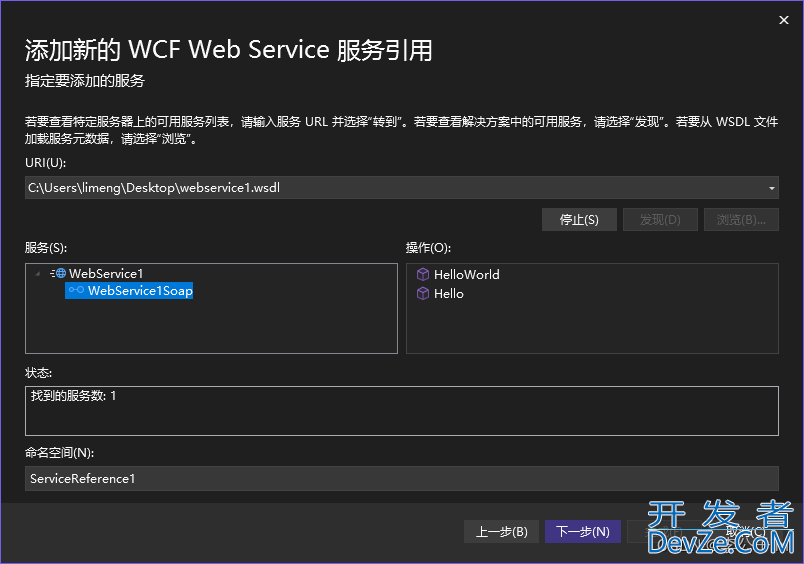
之后点击下一步,然后点击完成即可。
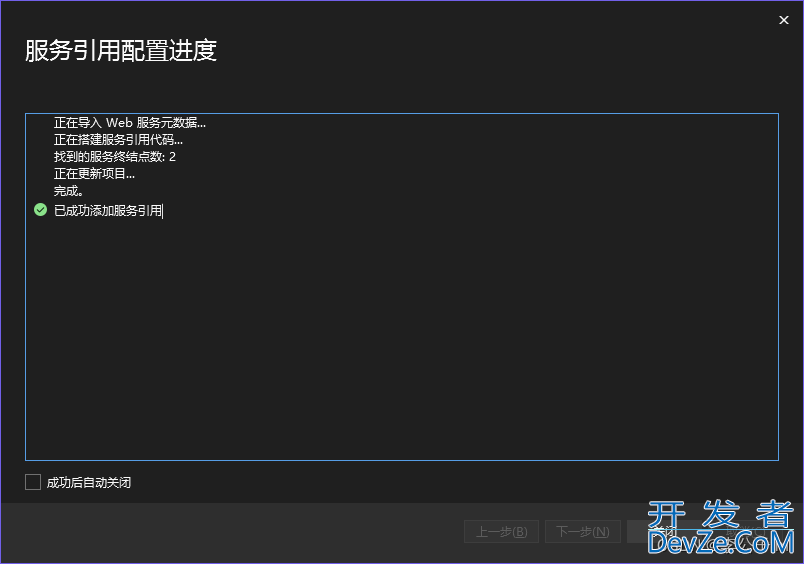
完成之后这里就多了两个文件。
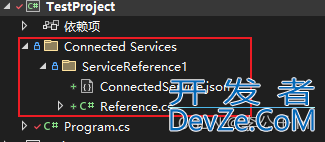
调用方式如下,直接实例化对应的类,然后就可以像调用普通方法一样,调用远程的服务接口了。
using ServiceReference1;
using Sy编程客栈stem;
using System.Threading.Tasks;

namespace TestProject
{
    public class Program
    {
        static async Task Main(string[] args)
        {
           await Test();
        }
        public static async Task Test()
        {
            var reference = new WebService1SoapClient(WebService1SoapClient.EndpointConfiguration.WebService1Soap12);
            var helloWorldResult = await reference.HelloWorldAsync();
            Console.WriteLine(helloWorldResult.Body.HelloWorldResult);
            var str = "张三";
            var helloResult = await reference.HelloAsync(str);
            Console.WriteLine(helloResult.Body.HelloResult);
        }
    }

}
返回结果如下,就像调用本地方法一样自然。
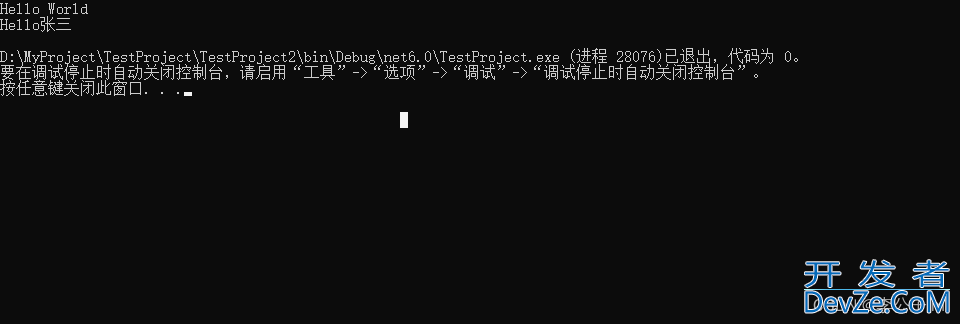
不过这里应该有地方需要按需修改一下,在Reference.cs文件中,远程服务地址是写死的。所以需要改成参数。
 private static System.ServiceModel.EndpointAddress GetEndpointAddress(EndpointConfiguration endpointConfiguration)
        {
            if ((endpointConfiguration == EndpointConfiguration.WebService1Soap))
            {
                return new System.ServiceModel.EndpointAddress("http://localhost:81/webservice1.asmx");
            }
            if ((endpointConfiguration == EndpointConfiguration.WebService1Soap12))
          android  {
                return new System.ServiceModel.EndpointAddress("http://localhost:81/webservice1.asmx");
            }
            throw new System.InvalidOperationException(string.Format("找不到名称为“{0}”的终结点。", endpointConfigur开发者_C入门ation));
        php}
改造方法也简单。添加一个url的入参。
private static System.ServiceModel.EndpointAddress GetEndpointAddress(string url,EndpointConfiguration endpointConfiguration)
    {
        if ((endpointConfiguration == EndpointConfiguration.WebService1Soap))
        {
            return new System.ServiceModel.EndpointAddress(url);
        }
        if ((endpointConfiguration == EndpointConfiguration.WebService1Soap12))
        {
            return new System.ServiceModel.EndpointAddress(url);
        }
        throw new System.InvalidOperationException(string.Format("找不到名称为“{0}”的终结点。", endpointConfiguration));
    }
以及引用这个方法的这里都加上url。
    public WebService1SoapClient(string url, EndpointConfiguration endpointConfiguration) :
            base(WebService1SoapClient.GetBindingForEndpoint(endpointConfiguration), WebService1SoapClient.GetEndpointAddress(url,endpointConfiguration))
    {
        this.Endpoint.Name = endpointConfiguration.ToString();
        ConfigureEndpoint(this.Endpoint, this.ClientCredentials);
    }
调用的时候把Url传进去即可。
var url = "http://localhost:81/webservice1.asmx";
var reference = new WebService1SoapClient(url, WebService1SoapClient.EndpointConfiguration.WebService1Soap12);
var helloWorldResult = await reference.HelloWorldAsync();
Console.WriteLine(helloWorldResult.Body.HelloWorldResult);
var str = "张三";
var helloResult = await reference.HelloAsync(str);
Console.WriteLine(helloResult.Body.HelloResult);
have a wonderful day。
总结
到此这篇关于C#创建WebService接口并连接的文章就介绍到这了,更多相关C#创建WebService接口并连接内容请搜索我们以前的文章或继续浏览下面的相关文章希望大家以后多多支持我们android!



 加载中,请稍侯......
精彩评论