目录
- 数据库设计
- 用户表
- 评论表
- 后端实现
- 相关依赖
- 实体类
- Mapper接口
- Service层和Controller层
- 前端实现
- 总结
在本文中,我们将介绍如何使用SpringBoot整合MyBATis-plus实现多级评论功能。同时,本文还将提供数据库的设计和详细的后端代码,前端界面使用vue2。

数据库设计
本文的多级评论功能将采用mysql数据库实现,下面是数据库的设计:
用户表
用户表用于存储注册用户的信息。
| 属性名 | 数据类型 | 描述 |
|---|---|---|
| id | int | 用户ID |
| username | varchar(20) | 用户名 |
| password | varchar(20) | 密码 |
| emapythonil | varchar(30) | 电子邮箱 |
| avatar | varchar(50) | 头像 |
评论表
用于存储所有的评论信息。
| 属性名 | 数据类型 | 描述 |
|---|---|---|
| id | int | 评论ID |
| content | text | 评论内容 |
| create_time | datetime | 评论创建时间 |
| parent_id | int | 父级评论ID |
| user_id | int | 评论用户ID |
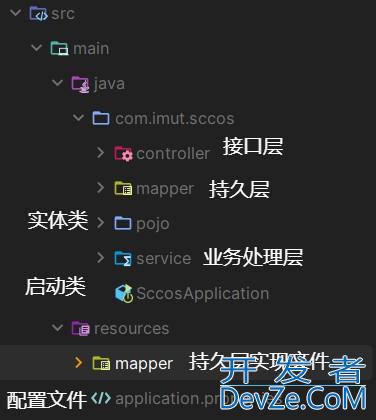
后端实现
相关依赖
首先,我们需要在pom.XML文件中添加以下依赖:
<!-- SpringBoot依赖 -->
<dependency>
    <groupId>org.springframework.boot</groupId>
    <artifactId>spring-boot-starter-web</artifactId>
    <version>${spring-boot-version}</version>
</dependency>
<!-- Mybatis-plus依赖 -->
<dependency>
    <groupId>com.baomidou.mybatisplus</groupId>
    <artifactId>mybatis-plus-boot-starter</artifactId>
    <version>${mybatis-plus-version}</version>
</dependency>
<!-- MySQL驱动 -->
<dependency>
    <groupId>mysql</groupId>
    <artifactId>mysql-connector-Java</artifactId>
    <version>${mysql-version}</version>
</dependency>
其中,${spring-boot-version}、${mybatis-plus-version}和${mysql-version}需要根据实际情况进行替换。
配置文件
接下来,我们需要在application.yml文件中配置MySQL的信息:
spring:
  datasource:
    driver-class-name: com.mysql.jdbc.Driver
    url: jdbc:mysql://localhost:3306/dbname?useUnicode=true&characterEncoding=utf-8&serverTimezone=Asia/Shanghai
    username: root
    password: root
  # Mybatis-plus配置
  mybatis-plus:
    # 实体包路径
    typeAliasesPackage: cn.example.entity
    # Mybatis XML文件位置
    mapperlocations: classpath:mapper/*.xml
    # 自动填充策略
    global-config:
      db-config:
        id-type: auto
        field-strategy: not_empty
这里需要将dbname替换成实际的数据库名称。
实体类
然后,我们需要创建实体类User和Comment,分别对应用户和评论。
@Data
public class User {
    private Long id;
    private String username;
    private String password;
    private String email;
    private String avatar;
}
@Data
public class Comment {
    private Long id;
    private String content;
    private Date createTime;
    private Long parentId;
    private Long userId;
}
Mapper接口
接着,我们需要创建Mapper接口UserMapper和CommentMapper,用于操作用户和评论的数据。
public interface UserMapper extends BaseMapper<User> {
}
public interface CommentMapper extends BaseMapper<Comment> {
    /**
     * 获取一级评论列表(即parent_id为null的评论)
     * @return 一级评论列表
     */
    List<Comment> listParentComments();
    /**
     * 获取二级评论列表(即parent_id不为null的评论)
     * @param parentId 父级评论ID
     * @return 二级评论列表
     */
    List<Comment> listChildComments(Long parentId);
}
BaseMapper是Mybatis-plus提供的通用Mapper接口,在使用时需要继承并指定实体类。
除此之外,我们还添加了两个自定义的方法listParentComments和listChildComments,用于分别获取一级评论和二级评论的信息。
Service层和Controller层
最后,我们需要创建Service和Controller层,实现业务逻辑和接口。
首先是CommentService:
@Service
public class CommentService {
    @Autowired
    private CommentMapper commentMapper;
    /**
     * 获取一级评论列表
     * @return 一级评论列表
     */
    public List<Comment> listParentComments() {
        return commentMapper.listParentComments();
    }
    /**
     * 获取二级评论列表
     * @param parentId 父级评论ID
     * @return 二级评论列表
     */
    public List<Comment> listChildComments(Long parentId) {
        return commentMapper.listChildComments(parentId);
    }
    /**
     * 添加评论
     * @param comment 评论信息
     */
    public void addComment(Comment comment) {
        commentMapper.insert(comment);
    }
}
然后是CommentController:
@RestController
@RequestMapping("/comment")
public class CommentController {
    @Autowired
    private CommentService commentService;
    /**
     * 获取一级评论列表
     * @return 一级评论列表
     */
    @GetMapping("/parent")
    public ResultVo listParentComments() {
        List<Comment> comments = commentService.listParentComments();
        return ResultUtil.success(comments);
    }
    /**
     * 获取二级评论列表
     * @param parentId 父级评论ID
     * @return 二级评论列表
     */
    @GetMapping("/child")
    public ResultVo listChildComments(@RequestParam Long parentId) {
        List<Comment> comments = commentService.listChildComments(parentId);
        return ResultUtil.success(comments);
    }
    /**
     * 添加评论
     * @param comment 评论信息
     */
    @PostMapping("/add")
    public ResultVo addComment(@RequestBody Comment comment) {
        comment.setCreateTime(new Date());
        commentService.addComment(comment);
        return ResultUtil.success();
    }
}
这里的ResultVo和ResultUtil是用于封装返回结果的工具类,这里不做过多解释。
前端实现
前端界面使用Vue实现。具体实现过程这里不做过多解释,在此提供代码供参考:
<template>
  <div class="comment-box">
    <h2>评论区域</h2>
    <h3>发表评论</h3>
    <form @submit.prevent="addComment">
      <div class="form-item">
        <label>评论内容:</label>
        <textarea v-model="comment.content" required></textarea>
      </div>
      <button type="submit">提交</button>
    </form>
    <h3>一级评论</h3>
    <ul>
      <li v-for="comment in parentComments" :key="comment.id">
        <p>{{comment.content}}</p>
        <button @click="showChildComments(comment.id)">查看回复</button>
        <div v-show="showChildCommentId === comment.id">
          <h4>二级评论</h4>
          <ul>
            <li v-for="comment in childComments" :key="comment.id">
              <p>{{comment.content}}</p>
            </li>
          </ul>
        </div>
      </li>
    </ul>
  </div>
</template>
<script>
import axIOS from 'axios';
export default {
  data() {
    return {
      comment: {
        content: '',
      },
      parentComments: [],
      childComments: [],
      showChildCommentId: null,
    };
  },
  methods: {
    // 获取一级评论列表
    getParentComments() {
      axios.get('/comment/parent').then(res => {
        this.parentComments = res.data.data;
      }).catch(err => {
        console.log(err);
  http://www.devze.com    });
    },
    // 获取二级评论列表
    getChildComments(parentId) {
      axios.get('/comment/child', {params: {parentId}}).then(res => {
        this.childComments = res.data.data;
      }).catch(err => {
        console.log(err);
      });
    },
    // 添加评论
    addComment() {
      axios.post('/comment/add', this.comment).then(res => {
        this.comment.content = '';
        this.getParentComments();
      }).catch(err => {
        console.log(err);
      });
    },
    // 显示二级评论
    showChildComments(parentId) {
      if(this.showChildCommentId === parentId) {
        this.showChildCommentId = null;
        this.childComments = [];
      }else {
        this.showChildCommentId = parentId;
        this.getChildComments(parentId);
      }
    }
  },
};
</script>
<style>
.comment-box {
  font-family: Arial, sans-serif;
  max-width: 800px;
  margin: autjso;
}
.form-item {
  margin-top: 10px;
}
.form-item label {
  display: inline-block;
  width: 80px;
  font-weight: bold;
}
.form-item textarea {
  width: 100%;
  height: 100px;
  border: 1px solid #ccc;
}
ul {
  list-style: none;
  margin: 0;
  padding: 0;
}
li {
  margin-top: 10px;
}
li p {
  margin: 0;
  padding: 5px;
  b开发者_JS开发order: 1px solid #ccc;
  border-radius: 3px;
}
</style>
总结
本文介绍了如何使用SpringBoot整合Mybatis-plus实现多级评论功能http://www.devze.com,同时提供了数据库的设计和详细的后端代码,前端界面使用的Vue2,希望本php文能够对您有所帮助。
到此这篇关于SpringBoot整合Mybatis-plus实现多级评论的文章就介绍到这了,更多相关SpringBoot多级评论内容请搜索我们以前的文章或继续浏览下面的相关文章希望大家以后多多支持我们!


 加载中,请稍侯......
精彩评论